Does your MacBook take ages to boot up? Is there a problem you can’t seem to get rid of? Do you want to tame the misbehaving machine? Or simply need to replace it and hand it over to someone without the slightest trace of your personal data and photos that you have hoarded over the years? In any case, resetting your MacBook to factory condition will address your concerns. If you’re wondering how to do that, our comprehensive guide will help you reset your MacBook. Follow the steps below to transform your device back into a new-like condition as if it was fresh out of the box.
Backup your Mac hard drive
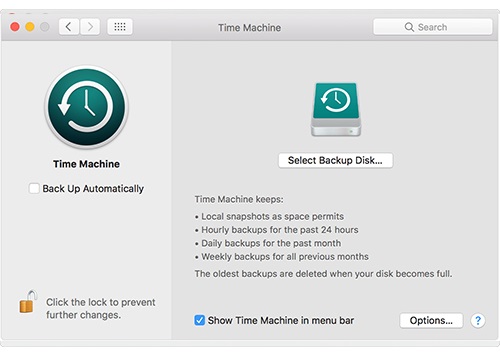
Doing a factory reset means that all the data on your hard drive will be wiped off. You might have numerous important documents, videos and photos that you’re keeping as memories. To create a backup of all that data via Time Machine, insert your chosen drive, click the Time Machine icon on top of the screen and click on ‘Back up now’.
Time Machine can be used by connecting an external hard drive with at least 500GB storage, to your MacBook and confirming that you want to use this drive for backup purposes. Your backup will start from there and may take several hours depending on the amount of data. Time Machine will automatically format your external hard drive to be Mac compatible so you don’t have to worry about buying drives specifically formatted for macOS.
Unlink your Apple ID
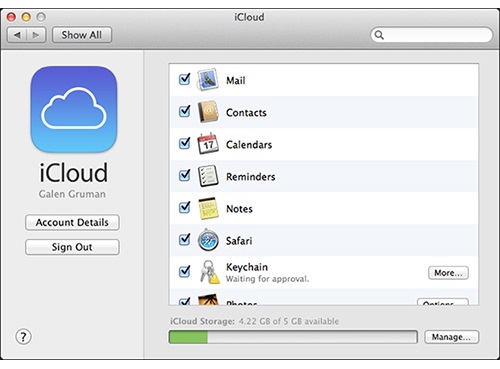
If you are giving your MacBook away, don’t forget to unlink your Apple ID and deauthorise iTunes. To unlink your Apple ID, boot up your MacBook Pro, go to System Preference > iCloud and click on Sign Out. Since the local copies of iCloud data are already saved on the Apple server, you can choose to remove them from your system.
You can also unlink by opening the iCloud website, signing in your Apple ID and selecting Find My Phone. You will see your MacBook Pro enlisted under All Devices. Simply select your device and click on Remove from Account.
Restart in recovery mode
After you’re done creating backups and unlinking your Apple ID, get ready to wipe your MacBook. Click the Apple logo at the top left of the screen and restart to enter the Recovery Mode. Hold down Cmd + Alt + R keys until the Apple logo or an image of a spinning globe appears on your screen. Your MacBook may take a while to enter this mode. Once the Recovery Area has been loaded, you will see a Recovery Mode Utilities window on your screen.
Erase your Mac hard drive
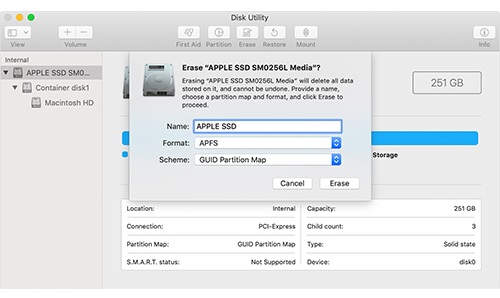
Now that you have reached the macOS Utilities Window. Select Disk Utility at the end of the list and click Continue. The sidebar on the left will show your main hard drive typically titled as Macintosh HD by default. To remove all your personal data off your hard drive, choose the Erase button. Make sure that the format you have selected is macOS Extended and then click the Erase button. Remember that doing so permanently removes all your data, so don’t erase unless you have taken a backup.
Reinstall macOS
Once you are done wiping off your hard drive, click Disk Utility at the top left corner of the screen and choose Quit. Doing so will take you back to the main Recovery Mode screen. Since you have erased all the contents of your device, you can’t really hand it over to someone or sell it without reinstalling macOS. On the Recovery Mode screen, select Reinstall macOS and click Continue. You will now be shown the version of macOS that your device will install which is usually the one that your MacBook came with. Click Continue and you will be taken to the terms and condition screen. Click Agree and select where you want to install the software to begin the installation. Once the installation is complete which may take a while, you will be asked for your Apple ID and password. Choose to quit the setup so that the person you are handing your MacBook over to can enter their own information.
Now that you know how to reset your MacBook Pro, you can hand it over or sell it without worrying about any traces of your personal data. For the latest updates and answers to all your tech problems keep visiting our blog here.


